This is a commission to make a stained glass lamp in the Tiffany style. There were no restrictions on the design or shape of the lamp, other than it must hang from the ceiling and give off plenty of light.
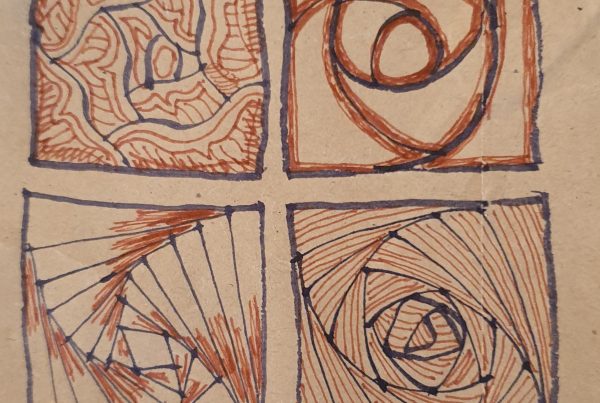
I’ve drawn the pattern in Illustrator, loosely based on motifs from a pattern book of “antique” lamps. Given this is my first lamp, I didn’t fancy trying to work around a round mould, so I decided to use this panel technique. This is only half the pattern – there will be six panels in total, and each panel will be unique. The cutting will be simplified along the way. The six little pieces in the butterfly wings, for example, will almost certainly be cut from a single piece of pretty glass, perhaps a confetti — my thinking is that the panels will be complicated enough without making it even more difficult for myself. I couldn’t find a pre-drawn pattern that would work for pieces that were smaller at the top than at the bottom, so I had to adjust the motifs to fit. I should have learned the lesson about adding swirls and spirals after my tribulations cutting the celtic horse, but you only get better by plugging away at it. Besides, if it was easy, anyone could do it. Besides, the swirls seemed appropriate to the subject matter. On one of the patterns, for example, I used the butterfly’s antenna as one of the swirls to separate the pieces.
My local glass shop said to make the panels & put them together, then bring the piece in and they will help me choose the appropriate fittings.
Steps for designing a stained glass lamp
This is my understanding of the process.
-
- Decide the size and shape of the lamp. Will it face downwards, so the bulb is visible from underneath, or upwards? Will it be made around a mould, i.e., bell-shaped or round, or constructed from panels? (If it’s shaped around a mould you pin the pieces to the mould somehow when soldering).
- Choose the glass. Clear (cathedral) glass is easier to cut because you can see through it, but then you’ll be able to see the light bulb through it. For that reason, this sort of lamp traditionally uses opaque glass. I’m not so fond of opaque glass, although it can be nice. I once made a Flamingo mirror from pink opaque glass — it cut easily but is a little awkward to work with.
- Get (or make a pattern) that is sized appropriately for the space. My lamp will be relatively small. (*** dimensions tba) It will consist of six panels.
- Cut and copper foil the pieces. It is important to be really accurate when cutting for 3D shapes, otherwise the finished pieces won’t fit together properly. Solder it together.
- Take the finished piece to the lamp shop and buy the fittings.
It seems so easy, just five little steps … watch this space!